

"There’s always a learning curve with every new service you offer, but luckily, there are plenty of resources available to ensure you master cap embroidery in no time."
Covering your bases but still having trouble embroidering caps?
Already using tear-away backing and 80/12 sharp point needles?
So what gives?!
Embroidery machines are designed to embroider on flat garments and, therefore, require special attention when embroidering on curved surfaces.
That doesn’t mean embroidering caps is impossible, though. In fact, most of the time, cap embroidery mistakes stem from user error.
That's why we created this blog to help you avoid making mistakes that keep costing you time and money!
By the end of this article, you’ll be one step closer to embroidering caps like a pro, so let’s dive in.
#1: Regular preventive maintenance is KEY

In order to get the best results from your machine during cap embroidery, you should oil and grease your machine as directed and clean the bobbin area often.
Look for thread build-up around the shaft and rotary hook, which may cause the needle to get too close to the point of the rotary hook, thus throwing off the machine’s timing.
If you keep breaking needles, your machine timing may be off due to lack of preventive maintenance. You may also be skipping some fundamental steps that can cause you to break needles or (worse) ruin your caps.
#2: Good cap embroidery starts with proper hooping
.jpg?width=480&name=cap-hooping%20(1).jpg)
Most cap embroidery issues stem from improper hooping. In order to guarantee seamless embroidery on your next cap, your cap must be hooped tightly. Make sure the band on the cap ring is securely fastened against the brim of the cap.
When hooping, pull down on the fabric as much as possible to minimize the space between the cap and the cap station. The flatter you can get your hat, the less issues you’ll experience during embroidery.
And don’t forget to always use binder clips to clip the excess fabric on the back of the cap to the pegs in the cap hoop.
If you struggle with cap hooping, watch this cap embroidery tutorial to learn how to do it the right way.
#3: Take measures against loss of registration!

Since the bobbin door is not easily accessible unless you remove the cap, make sure there’s a full spool of bobbin available to avoid any delays when embroidering caps.
Often times, when bobbin runs out, embroiderers simply remove the cap hoop, replace the bobbin and place the cap hoop back on the cap driver.
While that could work in some scenarios, it could also cause shifting depending on the type of design you’re embroidering. This can cause loss of registration, which is when the outline of the design does not line up with the fill.
Another way to prevent loss of registration is through making some tweaks to the digitized file. Click here to learn how you should be digitizing your designs to avoid loss of registration.
#4: Design size and placement matters
.jpg?width=480&name=placement%20(1).jpg)
Typically, the area near the bill is where your needle breaks happen. However, if your design is the right size, you can combat this.
Therefore, ensure that the bottom of the design is at least half an inch from the area where the seam meets the bill.
For optimal results, the average cap design should be around 2 ½ inches tall. However, this also depends on the profile of the cap, which refers to the size of the front of the cap. Click here to view more size recommendations depending on the profile of the cap.
#5: Don’t forget to slow down!
.jpg?width=480&name=slow-down%20(1).jpg)
The typical rule of thumb is to run caps at about 600 stitches per minute (SPM). However, this also depends on the type of hat and the intricacy of the design.
If you’re running a detailed design or small lettering, you should always slow your machine down to improve clarity, even when embroidering flats.
Slowing down to about 500 SPM also combats registration issues on intricate designs and needle breaks on structured caps.
Meanwhile softer hats can be embroidered at 600 to 700 SPM while more structured hats should be embroidered at 500 to 600 SPM.
Bottom Line
There’s always a learning curve with every new service you offer, but luckily, there are plenty of resources available to ensure you master cap embroidery in no time.
For more embroidery tips and machine embroidery projects, make sure to watch our machine embroidery tutorials on YouTube and join our Facebook community, Embroidery and Custom Apparel Mastery.
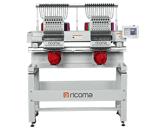
Are you curious how Ricoma can help your custom apparel business?
Schedule a call for a Quick 30 minutes "Embroidery Talk" with our specialists to see if you're really ready to start or expand your business. Our specialists can help you...
- Find helpful resources to kick start your embroidery education
- Answer any questions regarding pricing your items for profit and sourcing materials
- Help you compare and contrast different machine types and branch in the industry
- Help you determine which machine would suit your business based on your current and future goals