
"The idea of applying a new technique on hats (which are already notoriously hard to master) usually scares people off. But we can confidently assure you, it’s actually easier than you think."
In all our years in the embroidery industry, we hear a lot of the same questions. But the most frequent question will probably have to be…
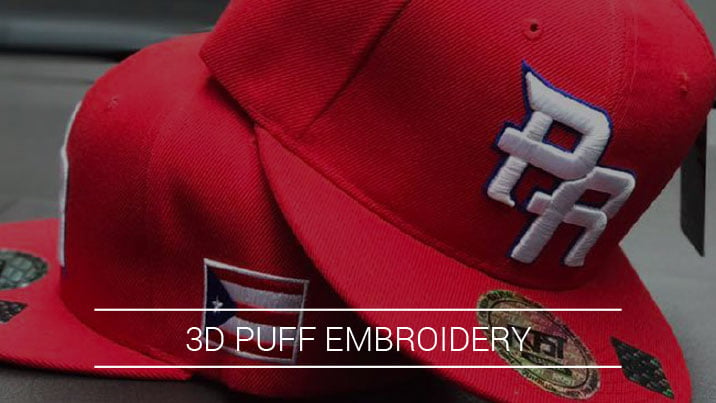
“How do I do 3D-puff embroidery on hats?!”
We get it. The idea of applying a new technique on hats (which are already notoriously hard to master) usually scares people off. But we can confidently assure you, it’s actually easier than you think. Ricoma customer Vick Barriera, who we call the 3D puff king, confidently uses this technique in his custom hats business. (Read until the end, so you can see what Vick has to say about his journey.)
With just a few extra steps and a couple more cents, you can create beautiful 3D puff embroidery (that you can charge more for than your average embroidered cap).
Once you see how easy it is to do, you’ll probably look something like this guy…
But seriously — if you want to take your skill to the next level, follow these simple steps listed below. You can also watch Ricoma Customer Success Specialist walk you through how it's done in this tutorial video.
First things first: digitizing! Every embroiderer knows the importance of good digitizing, as the embroidery process is totally dependent on the digitizing phase. You will never be able to embroider a design without issues if it’s not digitized properly. Before employing the 3D-puff technique, make sure to tell your digitizer to digitize the design for 3D-puff embroidery. Otherwise, it won’t work!
Let’s move on to phase two: the embroidery process.
Step 1: First, hoop your cap as you normally would. Then, load and position the cap onto the machine as usual. For instructions on preparing and running caps, you can check out this video.
Step 2: When uploading your design, you should import it to your embroidery machine the same way you upload any other design. However, you need to make sure to set your machine to automatic/manual mode. This will stop the machine after each color stop. We’ll tell you why this is necessary in the next step.
Step 3: Select the color sequence. If your design has been digitized correctly, you will notice the first color stop is the outline of your design. Press start to stitch the outline. The machine will begin embroidering and stop when it has completed the outline of the design.
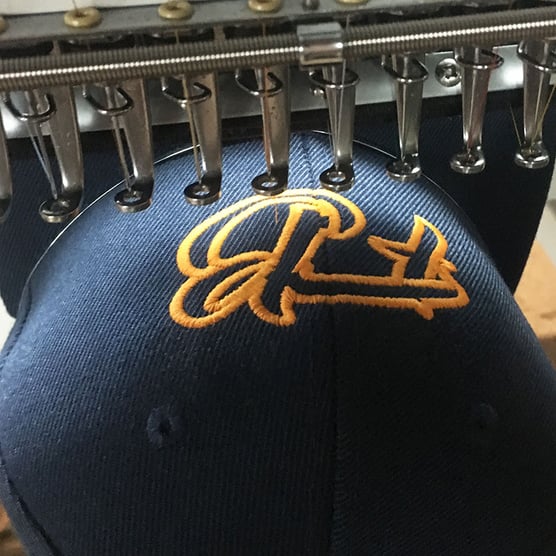
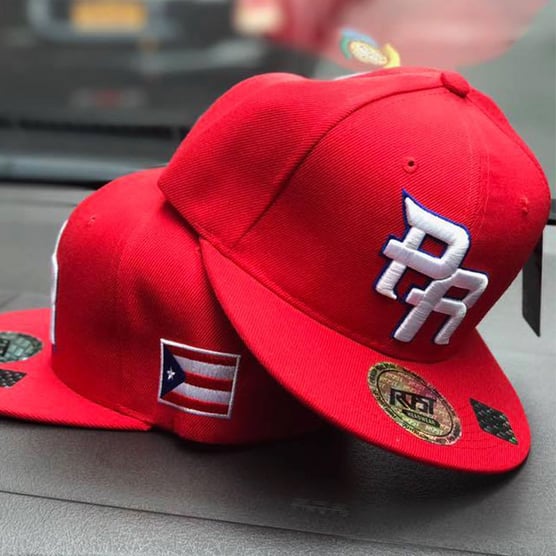
It’s important that the machine stops right after the first color stop, which is why we set it to semi-automatic. If you want your design to be one color, trace the outline of the design in the color you want the entire design to be. If you want the outline in a different color, you can embroider the outline in a contrasting color and use a different color in the next color stop. Check out how our customer Vick used two colors to create contrast. He embroidered the outline in blue and stitched the 3D part in white.
Once the outline is complete, it’s time for the fun part! Take your piece of foam, and cut it into a rectangular shape. Make sure it’s large enough to cover the area of the design (but that it doesn’t exceed past the front panels of the hat). You should leave at least one inch of foam around the design. Note: Since the thread is going to cover the foam, it’s important to use the same color foam and thread to avoid the foam showing through the thread.
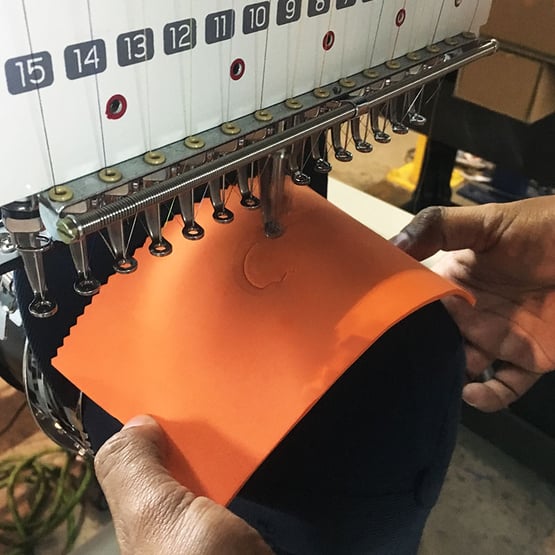
Step 5: Place the foam directly over the design, and press start. When the machine begins to run, you have to hold down the ends of the foam until the stitches can hold the foam on their own. To do this, you can hold each side of the foam with your hands (being extremely careful) or you can tape each end of the foam to the hat. Let the machine run for a few stitches until the foam no longer needs to be held and the stitches can hold down the foam on their own.
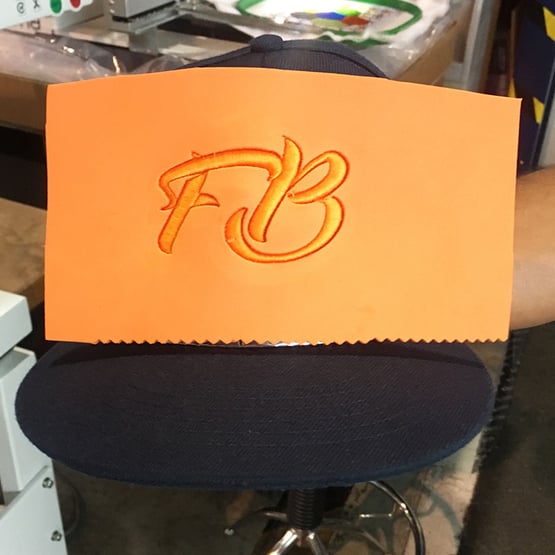
Step 6: Once the design is complete, remove the cap from the cap driver and peel off the excess foam. If there are bits of foam remaining in hard-to-reach areas, use a lighter or a heat gun to burn off the excess foam. However, be sure not to heat it for too long and ruin your design. TESTING IS HIGHLY RECOMMENDED!
Tips
- Because of the extra material, you should run your machine at a slower pace than usual to avoid any needle or thread breaks. We recommend running your machine at 500 to 600 stitches per minute.
- Use 100% polyester thread because it won’t burn as quickly if you clean up the excess foam with heat. Cotton or Rayon thread will burn quickly.
The advantage of 3D foam
- This technique is very popular among sports teams, which means you can target groups of people to get larger orders.
- Surprisingly, not every embroidery business offers 3D foam. The more techniques and styles you can offer your customers, the more money you’ll make.
- You can sell these hats at a higher price than a regular embroidered hat! Think of it this way: A team of 30 high school baseball players needs two hats for each of its players. What’s 60 times $20? $1,200. Each of these hats takes about ten minutes to embroider depending on the size of the design. That means it will only take about 10 hours of running your machine to make $1,200 (in this instance). Of course, if you account for other time-consuming steps, you can probably add an extra six hours and complete the entire job in two workdays. Either way, you’ve just made more than the average person makes in two weeks – in two days!
CUSTOMER SPOTLIGHT: MEET VICK BARRIERA, THE 3D PUFF KING!
Vick runs a custom hats business in New York. Since purchasing an embroidery machine, Vick has dabbled with all kinds of cap designs and techniques. Now, Vick confidently and regularly uses the 3D puff technique in his business. We caught up with Vick to ask him about how he got started and what advice he has for embroiderers.

"I originally used to take my designs to a local embroiderer who only would work with me by the dozen. So if I didn't like how the design looked, and I needed to make changes, I would have to place another order to see how that would turn out. As time passed by, it just caught my attention as to, 'Well I can learn this, master it and just work for myself.' So far I'm loving it. Every day I learn something new. It always amazes me how I can now make my images into an embroidery. I had a passion for making t-shirts as well, and I did that for a while until the embroidery machine fascinated me. Making a new image just makes me prouder and happier to know that I'm getting better and better. I chose to specialize in hats, truthfully, because it's what I learned first and I find it much easiest. I'm still trying to learn to place an image on the back of a cap. The best advice I can give, and it's a #1 rule: Always oil your machines. It's so important. I know my machine so well that I know when it needs oil and when it has been oiled."